If you’re reading this you probably have the exact same problem I had not long ago with my own sinking office chair. You were probably working or just watching a YouTube video and all of a sudden you find yourself closer to the floor, not knowing what’s going on. You’re getting confused, looking under your chair not knowing what you have done wrong to have such faith.
Well, at least that’s what happened to me… and it sucks.
It took me nearly an entire week to finally find a proper solution to my problem after wasting time and money by using the wrong tools or by listening to the wrong people.
But don’t worry:
I’m here to teach you how to fix a sinking office chair and to guide you through two cost and time-effective solutions, one of them costing even as low as $0.99; everything from my own experience.
Table of Contents
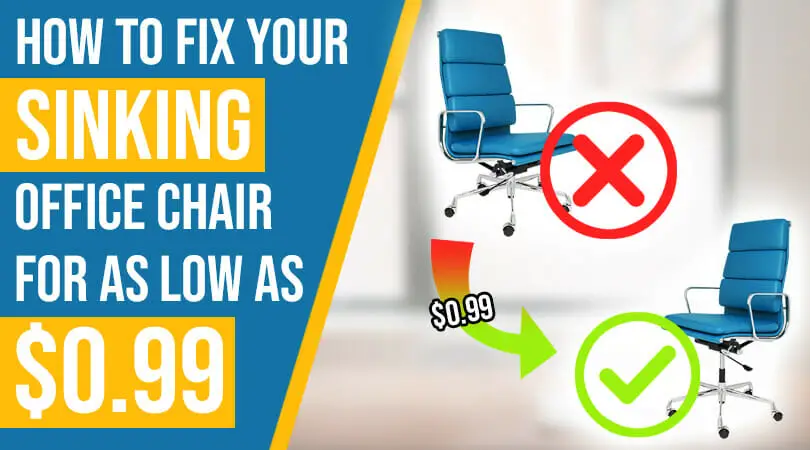
How to fix your sinking office chair
A sinking office chair is not an uncommon issue, believe me, or not.
Every chair that’s using a cylinder will have this problem at least once, every single one of them.
Cylinders wear out after a certain amount of time, it’s normal.
Enough talking, let’s see how you can fix your sinking office chair:
Solution 1. Lubricate the Components
Lubricating your chair components is a great way to eliminate annoying squeaky sounds. But this method can also help you restore a sinking chair.
Office chairs have plenty of moving parts that can fail or malfunction if all of these parts are not well-greased.
Before you buy new parts like a cylinder or invest in a PVC part for your chair that could hinder functioning, you should lubricate the components to see if this can perhaps solve your problem.
You can start by checking the lever that controls the height. If the lever stays put while you sit on the chair and yet you sink then your chair likely just needs a little bit of oil. Rust, old oil, or dust might have gotten into the components.
What you need for oiling your chair
What you need for oiling your chair
Before you get to work on oiling your chair, you should gather all the items you will need. Here is a quick look at the top must-haves for this DIY job;
- A silicone-based lubricant (any multi-purpose silicone-based lubricant will work but we recommend WD-40).
- An old cloth
- A spanner that suits your bolt size (this may vary based on the chair you have)
Here are the correct steps to follow for oiling your chair;
Step 1 – Flip your chair over
First, turn your chair upside down so you can access the cylinder. Most chairs have a plastic cover wrapped around the barrel. Remove this plastic cover by sliding it down so you can see the metal cylinder.
Step 2 – Spray WD-40 to clean the components
Before you add oil, you should spray some WD-40 into the cylinder. This product will clean out rust and other debris that might be clogging up the cylinder. The product also acts as a lubricant to oil all your joints. You can spray this lubricant onto all bolts, screws, and joints.
If you do not have a spray then you can also saturate a cloth in the oil before applying it to the joints.
You can also use your cloth to dab up any running oil so your chair won’t make a mess on your floor or carpets.
Step 3 – Fasten all loose components
Fasten up any loose bolts or nuts you see in your chair before you try using it again. If your chair is now functioning well then you likely just need to oil it more often.
Step 4 – Adjust your height
Once you are sure that all bolts have been fastened, you can flip the chair back over. Now adjust the height of the chair to see if it is now working.
If your chair is still sinking then the cylinder might not be functioning well anymore and might require replacement.
Solution 2. Replace your cylinder (Recommended)
After looking online for multiple types of tools I could use and also which cylinder I should buy I came across this tool kit that saved the day.
If you want to keep your ability to adjust the height of the chair then replacing your cylinder is the best thing you can do. It might be a little bit expensive depending on what your budget is but it is worth it.
Our recommendation:
- We’ve recommended this kit because it comes with a high-quality and long-lasting cylinder which got tons of amazing reviews on Amazon as well as on other high-traffic blogs.
The removal kit it comes with also plays a big role in why this cylinder replacement kit is worth it. Often enough removing the old cylinder is hard even when using tools such as a hammer.
But don’t worry, it’s extremely easy to replace your cylinder using the removal kit!
It contains:
- Gloves
- Old cylinder removal kit
Basically, it has everything you need.
It might look complicated but it’s not, let us show you the process.
Step by step photo-guide
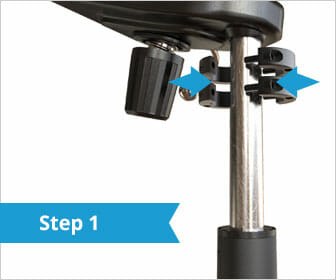
Attach the two shaft collars to the cylinder.
Fully tighten the lower collar, leaving the upper one slightly loose.
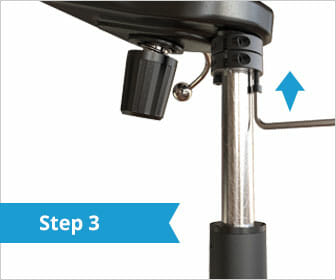
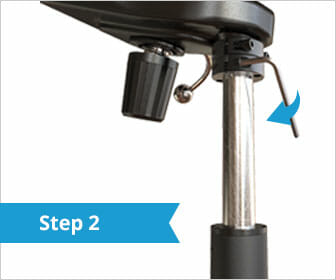
Allow the screws to push on the surface of the upper collar.
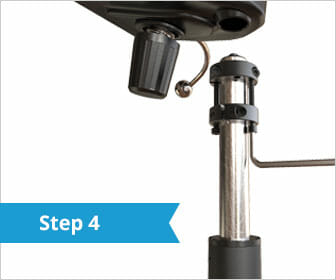
Tighten the screws until the old cylinder is removed from the seat.
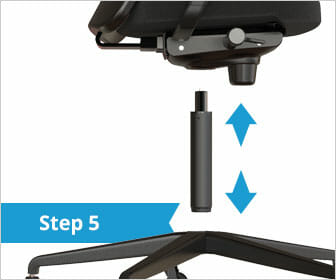
Add the new cylinder onto your chair and that’s it.

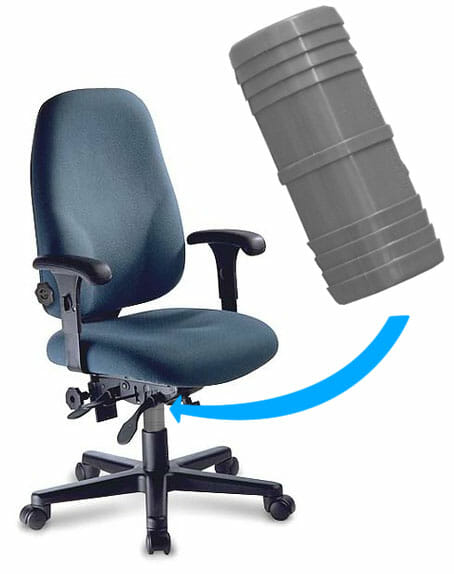
Solution 3. DIY Method – As low as $1
There is also one DIY solution on our list, just use a Poly Insert Coupling.
You’ll have to place the Poly Insert Coupling over the cylinder and you’re basically done.
Yep, that’s all you have to do.
Unfortunately, by using a Poly Insert Coupling you lose the ability to adjust the height of your chair as your seat will stay directly on it.
But… hey!
You can find a Poly Insert Coupling for as low as $0.99 at your local home improvement stores such as The Home Depot.
Solution 4. The PVC pipe DIY method
If your home depot doesn’t have these couplings, then you can also make your own from PVC pipe. This is an ideal emergency solution.
Here are the right steps for this free solution;
Step 1 – Measure your cylinder
Turn your chair over so you can see properly. Now slide the plastic tube over the cylinder away so you can see the metal cylinder. Measure the length, width, and circumference of the cylinder.
Step 2 – Find a suitable pipe
Now go and get a PVC pipe with a diameter that is the same circumference or slightly larger than the cylinder. Cut your pipe to the same length as the cylinder.
Step 3 – Saw the pipe vertically
Grab a hack saw and cut the pipe from top to bottom so you can easily slip it over the cylinder. If your PVC pipe is slightly bigger than the cylinder then you can skip this step.
Step 4 – Install the new pipe
You can now either pull the pipe open so you can clamp it over the cylinder, or you can remove the wheelbase so you can slide the pipe over the cylinder.
Step 5 – Test the height
With this method, your chair will no longer be adjustable in height. You should test the height of your chair to ensure that it has a comfortable feel. If it is too high, then you should cut the PVC pipe a little bit shorter until the chair has a proper height.
Once you are happy with the way your chair feels, you can slide the plastic cover back over the cylinder. Your chair should stop sinking.
For a quick cheap fix, I believe this method is perfect.
Bottom Line
People are often afraid that their chair is broken when it starts sinking but to be real with you, it’s just a small issue that anyone gets after using their office chair for many years.
Fixing a sinking chair is a 15 minutes job that nobody should be afraid of.
You don’t want to be spending around $30.00 to buy a new cylinder? That’s okay! Just go into your garage, find an old pipe that’s been forgotten in there, and fix your chair right away!
We hope this article was helpful to you and that we saved you time and money.
And if you decide to replace your chairs with new chairs then you should have a look at some of our other guides. We compare a wide range of chair types in our other buying guides. You can find the best recliner for sleeping after surgery, the best living room chair for neck pain, the best ergonomic chair for watching tv, the best small corner chair for the bedroom, and many others.
You might also want to read – 8 Best Reclining Office Chairs With Footrest + Bonus Resources that helped us write this article:
The buttons in this article contain affiliate links. The price of the product doesn’t increase in any way but we get a commission out of it.
Our decisions and reviews are not based on the commission we earn from the products.
The products we decide to put in our articles are chosen by quality as we focus on providing the best experience and the best information for our readers.
Privacy Overview
Always Enabled Necessary cookies are absolutely essential for the website to function properly. This category only includes cookies that ensure the basic functionalities and security features of the website. These cookies do not store any personal information.
Non-necessary
Any cookies that may not be particularly necessary for the website to function and are used specifically to collect user personal data via analytics, ads, and other embedded contents are termed as non-necessary cookies. It is mandatory to procure user consent prior to running these cookies on your website.